Wednesday, November 24, 2010

vol copy

This is effectively the same as a vol clone, but you need to do the entire operation before the volume is online and available. You need to create the destination volume first and then restrict it so that it is ready for the copy. Then you start the copy process.

# vol copy start -s snap_name source_vol dest_vol

“-s snap_name” defines the snapshot you want to base the copy on, and “source_vol” and “dest_vol” define the source and destination for the copy. “-S” can also be used to copy across all the snapshots that are also included in the volume. This can be very useful if you need to copy all backups within a volume as well as just the volume data.


# vol copy start [ -S | -s snapshot ] source destination

Copies all data, including snapshots, from one volume to another. If the -S flag is used, the command copies all snapshots in the source volume to the destination volume. To specify a particular snapshot to copy, use the -s flag followed by the name of the snapshot. If neither the -S nor -s flag is used in the command, the filer automatically creates a distinctively-named snapshot at the time the vol copy start command is executed and copies only that snapshot to the destination volume.

The source and destination volumes must either both be traditional volumes or both be flexible volumes. The vol copy command will abort if an attempt is made to copy between different volume types.

The source and destination volumes can be on the same filer or on different filers. If the source or destination volume is on a filer other than the one on which the vol copy start command was entered, specify the volume name in the filer_name:volume_name format.

The filers involved in a volume copy must meet the following requirements for the vol copy start command to be completed successfully:

The source volume must be online and the destination volume must be offline.

If data is copied between two filers, each filer must be defined as a trusted host of the other filer. That is, the filer’s name must be in the /etc/hosts.equiv file of the other filer. If one filer is not in the /etc/hosts.equiv file of the other filer then "Permission denied" error message is displayed to the user.

If data is copied on the same filer, localhost must be included in the filer’s /etc/hosts.equiv file. Also, the loopback address must be in the filer’s /etc/hosts file. Otherwise, the filer cannot send packets to itself through the loopback address when trying to copy data.

The usable disk space of the destination volume must be greater than or equal to the usable disk space of the source volume. Use the df pathname command to see the amount of usable disk space of a particular volume.

Each vol copy start command generates two volume copy operations: one for reading data from the source volume and one for writing data to the destination volume. Each filer supports up to four simultaneous volume copy operations.

# vol copy status [ operation_number]

Displays the progress of one or all active volume copy operations, if any. The operations are numbered from 0 through 3. If no operation_number is specified, then status for all active vol copy operations is provided.

# vol copy throttle [ operation_number ] value

This command controls the performance of the volume copy operation. The value ranges from 10 (full speed) to 1 (one-tenth of full speed). The default value is maintained in the filer’s vol.copy.throttle option and is set 10 (full speed) at the factory. The performance value can be applied to an operation specified by the operation_number parameter. If an operation number is not specified, the command applies to all active volume copy operations.

Use this command to limit the speed of volume copy operations if they are suspected to be causing performance problems on a filer. In particular, the throttle is designed to help limit the volume copy’s CPU usage. It cannot be used to fine-tune network bandwidth consumption patterns.

The vol copy throttle command only enables the speed of a volume copy operation that is in progress to be set. To set the default volume copy speed to be used by future volume copy operations, use the options command to set the vol.copy.throttle option.

How to clear the cache from memory

Linux has a supposedly good memory management feature that will use up any "extra" RAM you have to cache stuff. This section of the memory being used is SUPPOSED to be freely available to be taken over by any other process that actually needs it, but unfortunately Linux thinks that cache memory is too important to move over for anything else that actually needs it.

I noticed that whenever the server is booted, everything runs great. But as soon as it fills up with cache, performance degrades. It's terrible..

Up until just now, I have been forced to restart every time this happens because I simply cannot get any work done while in this state of retardation. I can close every single program I'm running - and even then, simply right clicking would require some extended thinking before loading the context menu. Ridiculous.

What consumes System Memory?

The kernel - The kernel will consume a couple of MB of memory. The memory that the kernel consumes can not be swapped out to disk. This memory is not reported by commands such as "free" or "ps".

Running programs - Programs that have been executed will consume memory while they run.

Memory Buffers - The amount of memory used is managed by the kernel. You can get the amount with "free".

Memory Cached - The amount of memory used is managed by the kernel. You can get the amount with "free".

Cached memory is freed on demand by the kernel.... it's done this way to make your system more responsive. Trust Linus Torvalds, he knows what he's doing.

There are few ways to check memory usage in Linux. By using the commands like free, vmstat and ps you will be able to check your linux memory usage:-

# free

The 'free -m' command displays the total amount of free and used physical and swap memory in the system, as well as the buffers used by the kernel.

Output:
total used free shared buffers cached
Mem: 1033612 354636 678976 0 240 201508
-/+ buffers/cache: 152888 880724
Swap: 1967952 0 1967952

You can also ask free to display results in every 5 seconds, in order to track the increases/decreases on memory usage.

# free -s 5

# vmstat

The vmstat command reports information about processes, memory, paging, block IO, traps, and cpu activity.

Output:

procs -----------memory---------- ---swap-- -----io---- --system-- ----cpu----
r b swpd free buff cache si so bi bo in cs us sy id wa
1 0 0 131620 35432 341496 0 0 42 82 737 1364 15 3 81 1


# ps

The command "ps" is a c program that reads the "/proc" filesystem.

There are two elements that are useful when determining the per process memory usage.

They are:
a. RSS
b. VSIZE

Per Process Memory Usage

The inputs to this section were obtained with the command:

# ps -eo pid,ppid,rss,vsize,pcpu,pmem,cmd -ww --sort=pid


Luckily, I found a way to clear out the cache being used. Simply run the following command as root and the cache will be cleared out.

Linux Command :

# sync; echo 3 > /proc/sys/vm/drop_caches

The main point "Don't Panic! Your ram is fine!" is absolutely correct.

The Linux disk cache is very unobtrusive. It uses spare memory to greatly increase disk access speeds, and without taking any memory away from applications. A fully used store of ram on Linux is efficient hardware use, not a warning sign.

Tuesday, November 16, 2010

Creating a FlexClone volume in OnTap 7.3

Flexible volumes let users do some really kool things. One of my favorites involves cloning. We can take an existing FlexVol volume and create a clone from it, either using the volume itself (right now) or using an existing Snapshot copy from some point in the past (like before your server blew up). A FlexClone volume looks exactly like the volume it was created from (its parent FlexVol volume or another FlexClone volume), but it uses no additional physical storage!

This code shows you how easy it is to create a FlexClone volume by:

1) Cloning a flexible volume and
2) Splitting a FlexClone volume from the parent volume.


1) Clone a flexible volume

Display list of snapshots in vol1
FAS1> snap list vol1


Create a clone volume named newvol using the nightly.1 snapshot in vol1
FAS1> vol clone create newvol –b vol1 nightly.1

verify newvol was created
FAS1> vol status –v newvol

Look for snapshots listed as busy, vclone. These are shared with flexclones of vol1 and should not be deleted or the clone will grow to full size
FAS1> snap list vol1

Display space consumed by new and changed data in the flexclone volume.
FAS1> df –m newvol

2) Split a FlexClone volume from the parent volume.

Determine amount of space required to split newvol from its parent flexvol.
FAS1> vol clone split estimate newvol

Display space available in the aggregate containing the parent volume (vol1)
FAS1> df –A

Begin splitting newvol from its parent volume (vol1)
FAS1> vol clone split start newvol

Check the status of the splitting operation
FAS1> vol clone split status newvol

Halt split process. NOTE: All data copied to this point remains duplicated and snapshots of the FlexClone volume are deleted.
FAS1> vol clone split stop newvol

Verify newvol has been split from its parent volume
FAS1> vol clone status –v newvol

Wednesday, November 10, 2010

How to clear NFS locks during network crash or outage for Oracle datafiles.

Symptoms :

Database cannot be opened because old locks still exist on the filer stored data files.

Error : ORA-27086

Cause of this problem :

Data files that were open during network episode left in NFS locked state. Oracle cannot open the locked files

The lock recovery manager (NLM) in the Linux kernel uses uname -n to determine the host name while the rpc.statd process (NSM) uses gethostbyname() to determine the client's name. If these do not match, the recovery process will not work

Solution :

This solution indicates the recovery steps detailed herein should be taken in case Oracle is hung, but that PROPER ORACLE TROUBLESHOOTING AND SUPPORT METHODS SHOULD BE FOLLOWED FOR ANY DATABASE-HUNG ISSUES, independently of NetApp.

Oracle's database product does not typically hang after a network crash.

Summary of Corrective steps :

1) Shutdown Oracle databases

2) Unmount database volumes

3) Kill lockd/statd processes on UNIX host

4) Clear locks on filer

5) Remove the NFS lock files on the host.

6) Restart lockd/statd processes on UNIX host

7) Remount the database volumes on the UNIX host

8) Restart databases

Detailed Procedure:

1) Shutdown all Oracle databases being run by the affected server.

Issue the Oracle shutdown immediate command and verify that no database processes are still running by issuing the UNIX command ps -ef |grep -i ora on the UNIX database host.

If database processes are still running issue the Oracle shutdown abort command and use the UNIX command ps -ef | grep -i ora to verify that no database processes are still running.

If database processes are still running do the following from the UNIX command line:
ps -ef | grep ora to get process id's (pid's) of remaining Oracle processes

kill -9 pid for each remaining Oracle process.

2) Unmount all database volumes using the UNIX umount command.

3) Kill statd and lockd processes on the UNIX host in the order specified below:
Determine the process id's (pid's) of statd and lockd from the UNIX command line:

ps -ef |grep lockd

ps -ef |grep statd

kill [lockd_process_id]

kill [statd_process_id]

4) Remove locks from filer

Execute the following from the filer command line:

filer> priv set advanced

filer> sm_mon -l (In many cases specifying the host name does not clear all the affecting locks, so the recommendation is to NOT specify a hostname)

Delete all files in the filer's "/etc/sm" directory. (Remove the files only. Do NOT remove the "/etc/sm" directory itself.)

If the filer is running Data ONTAP 7.1 or higher run 'lock break -h [hostname]' to release any locks that still exist.

Note:
If the 'lock break -h [hostname]' doesn't work, ensure that the server name that you are entering is not the same as the one that the filer has.

If the locks are not cleared, run 'lock break -p nlm' (This also requires Data ONTAP 7.1 or higher). This will clear all the NFS locks on the filer. This will not sever any NFS connections, it will simply force the processes to re-request the locks for the files they are writing to.

5) Remove the NFS lock files on the host.

From TR-3183 - Using the Linux NFS Client with Network Appliance Storage,
rpc.statd uses gethostbyname() to determine the client's name, but lockd (in the Linux kernel) uses uname -n.
By changing the HOSTNAME= fully qualified domain name, lockd will use an FQDN when contacting the storage. If there is a lnx_node1.iop.eng.netapp.com and also a lnx_node5.ppe.iop.eng.netapp.com contacting the same NetApp storage, the storage will be able to correctly distinguish the locks owned by each client. Therefore, we recommend using the fully qualified name in /etc/sysconfig/network. In addition to this, sm_mon -l or lock break on the storage will also clear the locks on the storage which will fix the lock recovery problem.

Additionally, if the client's nodename is fully qualified (that is, it contains the hostname and the domain name spelled out), then rpc.statd must also use a fully qualified name. Likewise, if the nodename is unqualified, then rpc.statd must use an unqualified name. If the two values do not match, lock recovery will not work. Be sure the result of gethostbyname(3) matches the output of uname -n by adjusting your client's nodename in /etc/hosts, DNS, or your NIS databases.

6) Start the UNIX statd and lockd processes from the UNIX host command line in the order specified below:

/usr/lib/nfs/statd

/usr/lib/nfs/lockd

7) Mount the database volumes on the UNIX host.

8) Start the database(s) and test for availability.

Monday, November 08, 2010

How to send email from the Linux command line using mail and mutt.

The Linux command line can be very powerful once you know how to use it. You can parse data, monitor processes, and do a lot of other useful and cool things using it. We will begin with the “mail” command.

MAIL

First run a quick test to make sure the “sendmail” application is installed and working correctly.

# rpm -qa | grep sendmail

The output should give you the version of sendmail installed "sendmail-8.13.8-2.el5".

Then execute the following command, replacing “abc@xyzemail.com” with your e-mail address.

# mail -s “Test email” abc@xyzemail.com

Hit the return key and you will come to a new line. Enter the text “This is a test mail”.
Follow up the text by hitting the return key again. Then hit the key combination of Control+D to continue.
The command prompt will ask you if you want to mark a copy of the mail to any other address, hit Control+D again.
Check your mailbox. This command will send out a mail to the email id mentioned with the subject, “Test email”.

To add content to the body of the mail while running the command you can use the following options. If you want to add text on your own:

# echo “This will go into the body of the mail.” | mail -s “Test email” abc@xyzemail.com

And if you want mail to read the content from a file:

# mail -s “Test email” abc@xyzemail.com < /home/oracle/test.log

Some other useful options in the mail command are:

-s subject (The subject of the mail)
-c email-address (Mark a copy to this “email-address”, or CC)
-b email-address (Mark a blind carbon copy to this “email-address”, or BCC)

Here’s how you might use these options:

# echo “This will go into the body of the mail” | mail -s “Test email” abc@xyzemail.com -c lmn@xyzemail.com -b pqr@xyzemail.com

MUTT

One of major drawbacks of using the mail command is that it does not support the sending of attachments. mutt, on the other hand, does support it. I’ve found this feature particularly useful for scripts that generate non-textual reports or backups which are relatively small in size which I’d like to backup elsewhere. Of course, mutt allows you to do a lot more than just send attachments. It is a much more complete command line mail client than the “mail” command. Right now we’ll just explore the basic stuff we might need often. Here’s how you would attach a file to a mail:

# echo “Sending an attachment.” | mutt -a backup.zip -s “attachment” abc@xyzemail.com

This command will send a mail to abc@xyzemail.com with the subject (-s) “attachment”, the body text “Sending an attachment.”, containing the attachment (-a) backup.zip. Like with the mail command you can use the “-c” option to mark a copy to another mail id.

SENDING MAIL FROM A SHELL SCRIPT

Now, with the basics covered you can send mails from your shell scripts. Here’s a simple shell script that gives you a reading of the usage of space on your partitions and mails the data to you.

#!/bin/bash
df -h | mail -s “disk space report” abc@xyzemail.com

Save these lines in a file on your Linux server and run it. You should receive a mail containing the results of the command. If, however, you need to send more data than just this you will need to write the data to a text file and enter it into the mail body while composing the mail. Here’s and example of a shell script that gets the disk usage as well as the memory usage, writes the data into a temporary file, and then enters it all into the body of the mail being sent out:

#!/bin/bash
df -h > /tmp/mail_report.log
free -m >> /tmp/mail_report.log
mail -s “disk and RAM report” abc@xyzemail.com < /tmp/mail_report.log

Now here’s a more complicated problem. You have to take a backup of a few files and mail then out. First the directory to be mailed out is archived. Then it is sent as an email attachment using mutt. Here’s a script to do just that:

#!/bin/bash
tar -zcf /tmp/backup.tar.gz /home/oracle/files
echo | mutt -a /tmp/backup.tar.gz -s “daily backup of data” abc@xyzemail.com

The echo at the start of the last line adds a blank into the body of the mail being set out.

Thursday, September 09, 2010

Using NFS mount to sort out a diskspace outage issue on MySQL server

Using NFS mount to sort out a diskspace outage issue on MySQL server

Identify the if the diskspace is full

[root@mysql01 ~]# df -h
Filesystem Size Used Avail Use% Mounted on
/dev/sda2 7.5G 7.1G 0 100% /
/dev/sda1 289M 17M 258M 6% /boot
tmpfs 1006M 0 1006M 0% /dev/shm

This clearly shows that the MySQL server has no diskpace available.

Identify the folder that stores the innodb files

[root@mysql01 ~]# lsof | grep mysql

[root@mysql01 ~]# lsof /var/lib/mysql

[root@mysql01 ~]# du -h ibdata1

[root@mysql01 ~]# lsof -p 10928

[root@mysql01 ~]# lsof -p 10928 | grep /var/lib/mysql

Stop the MySQL service

[root@mysql01 ~]# service mysqld stop

Create a NFS mount on a NFS Server 192.168.yyy.zzz eg. /vol/mysql more than your current MySQL data and mount the same to some local folder in your system.

[root@mysql01 ~]# mkdir -p /tmp/mysql

[root@mysql01 ~]# mount -o tcp,rsize=32768,wsize=32768,hard,intr,timeo=600 192.168.yyy.zzz:/vol/mysql /tmp/mysql

Chage the folder permissions

[root@mysql01 ~]# cd /tmp/

[root@mysql01 ~]# chown -Rf mysql:mysql mysql

Move all the data from the /var/lib/mysql directoru to the temporary folder/tmp/mysql/

[root@mysql01 ~]# cd /var/lib/mysql

[root@mysql01 ~]# mv ibdata1 /tmp/mysql/
[root@mysql01 ~]# mv ib_logfile0 /tmp/mysql/
[root@mysql01 ~]# mv ib_logfile1 /tmp/mysql/
[root@mysql01 ~]# cp -R mysql /tmp/mysql/
[root@mysql01 ~]# rm -rf mysql

Change the directory permissions.

[root@mysql01 ~]# chown -Rf mysql:mysql mysql

Unmount the NFS mount from the temporary location.

[root@mysql01 ~]# umount /tmp/mysql

Mount the NFS mount with the MySQL data as the original location, /var/lib/mysql.

[root@mysql01 ~]# mount -o tcp,rsize=32768,wsize=32768,hard,intr,timeo=600 192.168.yyy.zzz:/vol/mysql /var/lib/mysql

[root@mysql01 ~]# service mysqld start

Add the following line to your /etc/fstab file

[root@mysql01 ~]# vi /etc/fstab

192.168.yyy.zzz:/vol/mysql /var/lib/mysql nfs proto=tcp,rsize=32768,wsize=32768,hard,intr,timeo=600 0 0


Enjoy !

Monday, September 06, 2010

Support for Jumbo Frames is not enabled by default in ESXi 4.1. So to enable Jumbo frames you must login using the "Tech Support Mode" or the "Remote support Mode (SSH)".

Jumbo Frames should be enabled on every hop in the network otherwise it won’t work and you’ll find yourself in a position that the performance on the storage network will actual be worse than with Jumbo frames disabled.

Prerequisites:

  • We should have a ESXi host with multiple vmnics and following environment :
  • Switch and NFS storage both configured for Jumbo Frames and an MTU of 9000 bytes.
  • ESXi 4.1 configured with 2 vSwitches - vSwitch0 and vSwitch1
  • vSwitch0 has the default MTU (1500 bytes) and connected to the VLAN facing the users.
  • vSwitch1 connected to the same VLAN as the NFS Storage.
  • Full permission to the Host
  • Working knowledge of making changes to networking and storage.
The Process:

  • Login over SSH to your ESXi host
  • $ esxcfg-vswitch -l… that will list the current MTU
  • $ esxcfg-vswitch -m 9000 vSwitch1… set the MTU to 9000 (Jumbo Frames)
  • $ esxcfg-vswitch -l… verify the change
  • $ esxcfg-nics -l… verify that every NIC has the new MTU-Value

Thats it.

Reboot to see that the changes are persistent.

Tuesday, August 24, 2010

How To Convert Thick Virtual Disks to Thin in VMWare

How To Convert Thick Virtual Disks to Thin in VMWare ESX / ESXi


To convert a thick format disk to a thin format disk, clone the virtual disk with the destination disk type set to thin.
To clone a disk and convert it to thin format, run this command from the Service Console or from the VMware Command-Line Interface:
vmkfstools -i -d thin

For example:

vmkfstools -i vDiskName.vmdk -d thin vDiskNameThin.vmdk

If you are using VMWare RCLI application use :

vmkfstools.pl --server 192.168.xxx.xxx -i /vmfs/volumes/datastore1/VMSRV0004-VM1/VMSRV0004-VM1.vmdk -d thin /vmfs/volumes/datastore1/VMSRV0004-VM1/VMSRV0004-VM1-thin.vmdk

Note: Dont forget to go back to ESX server and remove the old .vmdk and -flat.vmdk files once you are sure that your VM is operating normally off the thin disk.

Wednesday, July 28, 2010

Zabbix 1.8.2 on CenOS 5.5 (x86_64)


Installing Zabbix 1.8.2 on CenOS 5.5 and generating fake load to check the installation
==================================================================================

Install the basic CentOS 5.5 on a machine.

==================================================================================

Update CentOS using the following command:

yum -y update

Note : Disable firewall and SELinux only for testing

==================================================================================

Install EPEL using the following command:

rpm -Uvh http://download.fedora.redhat.com/pub/epel/5/i386/epel-release-5-3.noarch.rpm

==================================================================================

Install mysql and php using yum:

yum install mysql mysql-server php php-gd php-bcmath php-xml php-mbstring php-mysql

==================================================================================

Download Zabbix rpm file from http://fedora.danny.cz/danny-el/5Server/

wget http://fedora.danny.cz/danny-el/5Server/x86_64/zabbix-web-mysql-1.8.2-2.el5.x86_64.rpm
wget http://fedora.danny.cz/danny-el/5Server/x86_64/zabbix-server-1.8.2-2.el5.x86_64.rpm
wget http://fedora.danny.cz/danny-el/5Server/x86_64/zabbix-1.8.2-2.el5.x86_64.rpm
wget http://fedora.danny.cz/danny-el/5Server/x86_64/zabbix-docs-1.8.2-2.el5.x86_64.rpm
wget http://fedora.danny.cz/danny-el/5Server/x86_64/zabbix-agent-1.8.2-2.el5.x86_64.rpm
wget http://fedora.danny.cz/danny-el/5Server/x86_64/zabbix-web-1.8.2-2.el5.x86_64.rpm
wget http://fedora.danny.cz/danny-el/5Server/x86_64/zabbix-server-mysql-1.8.2-2.el5.x86_64.rpm

==================================================================================

Install the downloaded Zabbix rpm's using the following command :

yum --nogpgcheck localinstall zabbix-1.8.2-2.el5.x86_64.rpm zabbix-server-1.8.2-2.el5.x86_64.rpm zabbix-server-mysql-1.8.2-2.el5.x86_64.rpm zabbix-agent-1.8.2-2.el5.x86_64.rpm zabbix-docs-1.8.2-2.el5.x86_64.rpm zabbix-web-1.8.2-2.el5.x86_64.rpm zabbix-web-mysql-1.8.2-2.el5.x86_64.rpm

==================================================================================

service httpd restart

chkconfig httpd on

==================================================================================
Configuring the Database part (MySQL)

service mysqld restart

chkconfig mysqld on

mysqladmin -u root password passw0rd!

mysql --user=root --password=passw0rd!

Welcome to the MySQL monitor. Commands end with ; or \g.

mysql> create database zabbix character set utf8;

mysql> create user 'zabbix'@'localhost' identified by 'password';

mysql> grant all on zabbix.* to zabbix;

mysql> flush privileges;

mysql> quit
Bye

Insert schema, data and images

cd /usr/share/doc/zabbix-server-mysql-1.8.2/create/schema

mysql --user=zabbix --password=password zabbix <>

cd ../data/

mysql --user=zabbix --password=password zabbix <>

mysql --user=zabbix --password=password zabbix <>

==================================================================================

Configuing PHP

edit /etc/php.ini
;...
;max_execution_time = 600
;max_input_time = 600
;memory_limit = 256M
...
;upload_max_filesize = 16M
...
;post_max_size = 32M
...
;date.timezone = Europe/Brussels
...
;mbstring.func_overload = 2
...

==================================================================================

Config Zabbix-server

edit /etc/zabbix/zabbix_server.conf
...
# Database user
DBUser=zabbix
....
#DBPassword=
DBPassword=
...

==================================================================================

Config Zabbix-webinterface

create /usr/share/zabbix/conf/zabbix.conf.php (remove the ;)

;
;global $DB_TYPE,
;$DB_SERVER,
;$DB_PORT,
;$DB_DATABASE,
;$DB_USER,
;$DB_PASSWORD,
;$IMAGE_FORMAT_DEFAULT;
;$DB_TYPE = "MYSQL";
;$DB_SERVER = "localhost";
;$DB_PORT = "0";
;$DB_DATABASE = "zabbix";
;$DB_USER = "zabbix";
;$DB_PASSWORD = "";
;$IMAGE_FORMAT_DEFAULT = IMAGE_FORMAT_PNG;
;?>

==================================================================================


service zabbix-server start

chkconfig zabbix-server on

service zabbix-agent start

chkconfig zabbix-agent on

lsof -i:10050

more /var/log/zabbix/zabbix_agentd.log

==================================================================================

http://server/zabbix

Login using the following credentials :

login: admin / password: zabbix

==================================================================================

Generate Fake CPU load :

perl -e 'while (--$ARGV[0] and fork) {}; while () {}' 4

top

==================================================================================

Generate Fake Disk-IO load and Free unused memory currently unavailable :


dd if=/dev/zero of=junk bs=1M count=1K (This will vreate a 1 GB file)

dd if=/dev/zero of=junk bs=1M count=10K (This will vreate a 10 GB file)

This is an useful command for when your OS is reporting less free RAM than it actually has. In case terminated processes did not free their variables correctly, the previously allocated RAM might make a bit sluggis over time.

This command then creates a huge file made out of zeroes and then removes it, thus freeing the amount of memory occupied by the file in the RAM.
In this example, the sequence will free up to 1GB(1M * 1K) of unused RAM. This will not free memory which is genuinely being used by active processes.

rm -rf junk

==================================================================================

Monitor Disk IO performance using iostat:

yum -y install sysstat

iostat -x 10 > /tmp/iostat.txt

tail -f /tmp/iostat.txt

==================================================================================

Test network speed without wasting disk

dd if=/dev/zero bs=1M count=1M | ssh root@192.168.160.161 'cat > /dev/null'

The above command will send 1GB of data from one host to the next over the network, without consuming any unnecessary disk on either the client nor the host. This is a quick and dirty way to benchmark network speed without wasting any time or disk space.


ENJOY !

Wednesday, July 07, 2010

Set timezone using /etc/localtime configuration file in Linux

Often /etc/localtime is a symlink to the file localtime or to the correct time zone file in the system time zone directory.


1 Log in as root, check which timezone your machine is currently using by executing `date`.
You'll see something like Thu 10 Jun 2010 12:15:08 PM IST, IST in this case is the current timezone.

2 Change to the directory /usr/share/zoneinfo here you will find a list of time zone regions. Choose the most appropriate region, if you live in Canada or the US this directory is the "America" directory.

3 If you wish, backup the previous timezone configuration by copying it to a different location. Such as
#mv /etc/localtime /etc/localtime-old

4 Create a symbolic link to the appropriate timezone from /etc/localtime. Example:
#ln -sf /usr/share/zoneinfo/America/New_York /etc/localtime

5 Some distro use /usr/share/zoneinfo/dirname/zonefile format (Red hat and friends)
# ln -sf /usr/share/zoneinfo/EST localtime

6 Set the ZONE entry in the file /etc/sysconfig/clock file (e.g. "America/New_York")

7 Set the hardware clock by executing:
#/sbin/hwclock --systohc

Using NTP (Network Time Protocol)

NTP will connect to a server to get the atomic time. It can be downloaded from www.ntp.org/downloads.html To get started with NTP simply download it, install it, use the ntpdate command followed by a public time server, and update your hardware clock.
$ ntpdate "0.pool.ntp.org (0, 1, or 2)"
4 Nov 22:31:28 ntpdate[26157]: step time server 209.81.9.7 offset 22317290.440932 sec
$ hwclock --systohc

To keep your time accurate you can create a cron job that executes:
(the -w option is the same as --systohc)
#ntpdate "server name" && hwclock -w

Saturday, August 25, 2007

Trek to Thanale Caves

After the fantastic nature trail at SGNP on 18th August, where we did the Yewoor trail passing through the fantastic Kanheri caves I was totally fascinated by the spirit of the Buddhist monks and the pains they took in carving out each and every detail of their imagination on stone, I definately wanted to see some more. The moment Doreen sent the mail regarding the Caves of Thanale, which are believed to be 2,200 years old for the next weekend, I knew I was going there inspite of all odds.

We were supposed to meet on Sat morning at 6.45 am at Hotel Vrindavan near Sion station. I reached there along with Krunal around 6:30 am and waited for others sipping masala tea in the hotel. After some time Darshana and Ashokji reached there too. we started our journey at about 7:00 am after Doreen, Roshan, Marge and Vandana joined us. Unfortunately When we were about to leave the taxiwalas told us that we had a flat rear tyre and then we kept our fingers crossed till we reached the punturewala. After filling some air in the tyre we started our journey as he was of the opinion that it was not a punture.

We reached Pali, a scared place for the Hindus, this Ganapati is considered to be a part of the Asthavinayak Circuit after some 2 hrs of driving. After taking directions from locals we reached Nadsur village which is about 12 kms from Pali. Thanale which is the base village is about 4 kms from Nadsur. We took two villagers Bhabhan and Maruti as our Trek guides. As we entered the woods the jungle grew thick and was very rich in Flora and Fauna. Moving slightly ahead we came across two beautiful water streams which we crossed over and marched ahead. The first sight of the caves was amazing. They appeared dotted in a row at a distance. We rested near the 2nd second water stream for a while and then reached the caves after a 2 hour trek from
Thanale village.

The caves encompass an arrangement of about 20-22 halls, each meticulously provided with spaces in the form of benches and reclining platforms. Cave-8 is the only chaitya. Cave-3 is memorial complex consisting of 6 monolith, 2 corner stones & 5 built-up i.e. total 13 stupas. Cave-7 is model for engineering, architecture & grandeur. Vestigies of ancient plastering & paintings are present. Four 'Shree' i.e. 'Laxmi' idols. The last vestiges found in one of the caves point to an association with the erstwhile Mauryan dynasty. There are exquisite carvings decorating the ceilings and doors. For the first time punch-marked silver coins of Ashokan
period (268-227 B.C.) were found here. These caves may be elder than the Bhaja cave complex, the oldest known.

After the decline of Chaul as port during the end of the 5th century, the trade routes altered & this cave complex was rendered desolate & fell into oblivion. It was rediscovered by a missionary J. A. Abbot in January 1890. The revolutionary Vasudev Balvant Phadake used to take refuge in these caves. The 'Siristan' mentioned at Pandavleni, Nashik, most probably refers to this 'Shree-sthan' i.e. Thanale.

After lunch and a couple of photography sessions we started the descent as we had to also get under the beautiful waterfall which bhabhan had promised us to take on our journey back and The Pali Ganapati temple. We were blessed by the rain gods as it started raining as soon as we started back. Reaching the first stream we realised how A bath in a waterfall pool can be a strong cleansing experience, we followed the stream uptill a huge waterfall and could feel the strength of the winds that are created by the falling waters. It was a breathtaking experiece to be in such a field of power. Bathing in the pool of a gentle waterfall and rejuvenating experience of a lifetime.

On reaching the Thanale village we washed up ourselves at Bhabhan's place and then moved on towards our vehicle where we had a huge shock of our lives, our Sumo tyre had gone flat. After replacing the rear tyre we headed towards the Ballaleshwar temple at Pali. Named after Ballal, son of Kalyan Shreshthi, from whose `tapasya', Ganesh appeared at pali. The deity is known
as Ballaleshwar. Erlier the deity was placed in a wooden temple. The wooden temple was so constructed that the rays of the sun would fall directly on the deity from the two equinoxes of the temple. The temple was reconstructed in 1770 by Morobadada Phadanvis. The Ganesh idol in the temple is 3 ft. high. Behind the temple, another temple of Ganesh, known as Dhundi Vinayak is situated. The Peshwas had installed the big bell, in the temple which is of Portuguese make. Inner sanctum is quite big and is 15 feet high. Outer sanctum is 12 feet high and it has rat idol with Modak in his hands and facing Ganesh. Temple walls are made quite strong by
mixing lead with cement while construction.Hall of the temple is 40 feet long and 20 feet broad and it was built by late Shri Krishnaji Ringe in 1910 A.D. Hall is very beautiful with 8 pillars resembling cyprus throne tree. Idol of Vinayaka sitting on stone throne, faces east and its trunk is left turned. The shining diamonds are embedded in the eyes and naval. The background is of silver where one finds Riddhi and Siddhi waving chamaras. Temple complex has a big bell made in Europe. After defeating portuguese in Vasai and Sasthi, Chimaji Appa brought these bells and offered them at different Ashtavinayak places.

After taking the darshan of Lord Ganesha we took a small break at a Hotel near the temple. I had Medu Vada and Kokam Sharbat while others had batata vada and Sabudana vada.

We started towards Mumbai at about 6:30 pm and reached sion at about 9:15 pm. I took a rickshaw to Bandra from where I took the Virar fast to Vasai and reached home at about 10:30 pm. for a pictorial journey of the trip visit my online album at:

http://picasaweb.google.com/harishdixit/thanalecaves

Monday, July 30, 2007

Trek to Sagargad

Doreen had selected Sagargad for a trek on the 29th August and with the rains taking a big long break for over 3 weeks I was wondering if she had taken the right decision as the main attraction we had heard was the monsoon waterfall. When it started raining heavily on Friday itself my joy knew no bounds in anticipation of a great trek. As it was going to be a long day, Ashok had suggested that we stay overnight at his resort Aswath, near Panvel.


On Sat 28th July, I and Girish took the 18.20 Panvel train from Kurla, and met the rest of the gang, Doreen, Farida along with Natasha, Doreen’s niece and her two friends, Shabda and Nikita at Panvel station. Ashokji drove us the 20 mins distance to his charming little cottage. After rubbing our exposed skin with odomos we settled down with wine and vodka, courtesy Ashokji and yummy farsan provided by Natasha. We had Dinner at a nearby dhaba like restaurant and hit the bed at 11 pm.


Morning after lemon tea and small breadrolls and chese spread we set off in Ashokji's Sumo at 7.50 am for the base of Sagargad halting enroute for a hearty b/f of vada pav and missal

After parking the sumo near Khandala village, we started the trek at 9.30 am. The climb was very gentle and we had to pass a few streams. As Shabda and Nikita were exhausted at the beginning of the trek itself, they opted to stay near the Sidheshwar temple. The climb to the fort took us around 3 hrs. With breath taking views of the green valley, the winding Kundalika river, the Arabian Sea near Alibag and two islands which we were not able to identify. The hillock on our right we took it as Kankeshwar.


On reaching the top, the heavenly sight of 2 white backed vultures flying overhead was one of the highlights of our trek. We also sighted some butterflies like, common leopard, glassy tiger, yellow orange tip, white orange tip, common crow, danaid eggfly, chocolate pansy. While we heard many bird calls we sighted very few including female sunbird and red vented bulbuls.


The second highlight of the trek was the fantastic waterfall which is close to the temple route. The drop of the fall is around 100 ft and the force is so strong that even standing 75 ft away, the spray drenched us completely. It was the most beautiful waterfall experience for me.


We reached our vehicle around 4.20 pm and after hot tea and bhajias at Karnala Hotel, with a fantastic view of the Karnala pinnacle we changed clothing at Ashokji's place and set off for home with songs of Mohhamed Rafi and Manna Dey. Some of us got off at Vashi station. I and Girish got off at Sion station and then took the rickshaw to Bandra and took the Virar train. I reached home at 11.30 pm in complete ecstasy of the best trek I have ever done"

For a pictorial description of the whole trek, Please visit my online album at: http://picasaweb.google.com/harishdixit/sagargad

Cheers !

Harish.

Monday, July 23, 2007

Trek to Peb Fort (2200ft)

The Peb fort can be climbed from Neral station, a distance of six miles. The fort itself is not very big or famous and is also named as ‘VikatGad’. At the foot of the hill is a goddess called Pebi, who appears from her name to be the deity of the fort. Half way up the hill is a god called Mhasoba and about a quarter of a mile beyond are two caves, and a rock-cut cistern.

I got to know about this trek from a topic posted by Bharat Sonar (Who was also one of the four Trek Leaders amongst Ganesh, Karen and Pooja) on the Orkut Community, "Sahyadri".

We were supposed to meet at 8 A.m. at Kalyan Station to board a train to Neral, which is the closest railway station to Peb. We took the 8:40 A.M train to Khopoli and believe me it was a hell of a job to get into the overcrowded train as Sunday is a day where most of the picnickers head for Matheran, the famous hill station nearest to Mumbai. There was a group of picnickers who were singing all sorts of old Marathi songs to the accompaniment of a bongo. It looked right out of a picture book. The rest were playing antakshari.

Finally we reached our destination. After getting down at the Neral Station I realised that I was the only person from our group to have got into the 2nd class compartment while others had got into the 1st class compartment and had a luxurious journey.

Before starting off with our journey, we took a halt at a small hotel near Neral station where We had our breakfast (Misal Pav and tea) and got ready to leave for the fort. It took some 20 minutes of traveling through small winding country roads to reach the village at the base of the hill. It was a small village, with its tiny half naked children playing and climbing on trees.


The initial part of the path passed through village fields and surrounding shrubs. Walking parallel to a small flowing water stream, we entered some dry brush at the base of the hill. After an hour or so the vegetation changed and became more and more denser and wilder.


We passed by a cave of Swami Samarth and a Ganapti temple before climbing a ladder which was a very unusual thing I had ever done in any of my treks.


After sacrificing away tones of calories with buckets of perspiration, A two-two and a half hour climb brought us to the small temple of Lord Mhasoba.


There was a water tank near the temple which had a small stream of flowing water as the water source someone had very artistically placed a banana leaf which narrowed down the water flow and we filled our water bottles there. We decided to halt and have our lunch there. Every one shared their food and after a small break we decided to move to the pinnacle of the fort.


We had to harldy climb for 10 minutes to reach the pinnacle where one can find the "Dattatreya Padukas" (Foot imprints of Lord Dattatreya).


There was a sheer drop to the lowlands on both the sides of the Pinnacle. We had a full fledged Photo session I decided to take some rest. I would have liked to stay there for a day or so but we had to hurry as we had to reach Neral before the last train to Mumbai left Neral at 10:57 P.M.


We again marched towards the desired destination at about 4:30 P.M. and reached a certain part on the plain which was full of cool breeze enough for relaxing. The air was filled with fresh green grass and fresh green leaves smell (one can never get to experience in the city life). Yes it’s true I could even feel the colour of the smell green and fresh indeed. I felt fresh like I never felt before. Ganesh took us to a lesser known place known as "Kotwal Buruj" a place which was used as a watchtower to keep an eye over the approaching armies of the enemy. The view of the valley down from that point was simply amazing.


We reached Neral at around 7:45 P.M. and took the 7:56 P.M. Semi Fast train to Chatrapati Shivaji Terminus. I was lucky enough to get a seat as a couple who had to get down at Ambernath decided to go near the door after Badlapur as the train was heavily crowded. I was able to catch a small nap in the Train till Dadar and then I took the Virar local to Vasai.


The Peb fort, as of the forts in Maharashtra exists in pieces, which one really has to dig hard for. There is nothing on the fort, which can strongly confirm its one time existence. The real fun is not visiting a fort which is untouched, like those many in Jaipur. The non-existence of these forts confirms the thrilling history of Maharashtra, full of wars and fights fought against Mughals, Nizams and even British governance. The other fact not to be overlooked upon is the way they were built. We find it tough to walk through bare hands. Think of the times, when Maratha Sardars used to climb it up with their horses and kilos of weight of the swords in the hands. Cool, isn't it?


To enjoy the pictorial journey please visit my online album on :http://picasaweb.google.com/harishdixit/peb

Cheers !
Harish.

Monday, July 09, 2007

Waterfall Rappelling at Kondana Caves !

Set in the valley of the Ulhas, at the foot of the magnificent Rajmachi, is this charming group of 8 Buddhist caves of the Hinayana Buddhist tradition and a small tank of water. While most of them are simple Viharas and caves in less than superb condition, the highlight of this settlement is the enormous Chaitya we first see as we approach.

A massive doorway with intricate carvings, a stupa flanked with the pillars typical from that era and interesting sculptures of dancing men and women are the highlight of this location. The style of carvings, and the octagonal design of pillars suggests that this cave may have been created some time around 200 BC - 100BC.This cave group brings to life a world of its own in the monsoons, when the unrelenting rain and misty weather turn it into a world of rich green visions from a period when it may have been inhabited. A waterfall forms a curtain of water isolating this world in our imagination further from the rest of the region as we view it through a veil of water. It is believed that during an earthquake in the early 1900s, a large portion of the front, floor and stupas were damaged, leaving the pillars in the chaitya suspended like huge stalactites from the ceiling.
I boarded the private Mini Bus from Dadar near Chitra Cinema. We reached the Kondivade village near Karjat by 10:30 AM and set off for the caves, accompanied by the Nature and Adventure experts from "The Explorers". This was an easy hike-and-nature-trail. We reached the top of the cave from a path which cuts left a short distance before the regular path. We had some time for rest and then started the waterfall rappelling activity.


While descending from the rope the scene down there was fantastic, it really gave a very different view of the beautiful Hinayanpanthiya Caves. The other visitors near the caves were cheering from down below and then came to congratulate everyone who came down rappeling as if we were back from a journey to the Moon.

After clicking a couple of photographs, we returned for a late, but huge lunch, followed by some free time to digest it. We headed back home around 6:30 pm but due to a flat tyre we were stranded neat Karjat. We utilised the extra time by chit-chatting and sipping hot tea at a small dhaba kind of a place near Karjat and were back in Mumbai (Dadar) around 10:30pm.

To enjoy the pictorial journey please visit my online album on :
http://picasaweb.google.com/harishdixit/kondanacaves

Cheers !
Harish.

Sunday, July 08, 2007

Birding trip to Suriamal.

On the 3rd of July, When I received the mail from Doreen I was pretty excited about the birding trip on Sat 7th July to Suriamal, near Jawahar-Khodala-Mokhada area as I had not done it for a long long time.

After some Google-ing on the net I was pretty excited to find that Suriamal is situated around 32 km north from Wada junction. This essentially tribal belt comprises largely hilly terrain east of NH8 and much of the region seems like the hand of development has just passed it by, despite proximity to Mumbai and Thane cities. There are some good forest pockets amid largely open and sparsely vegetated terrain that springs to energy with the monsoon rains when a veritable empire of life unfolds as numerous streams and rivers turn into gushing torrents and myriad waterfalls spring forth. There isn't any Protected Area declared here and considerable stretches of forest are being degraded due to continuous human disturbance, resulting in a low number of most wildlife species.

We were supposed to meet in Sion at 6:45 AM near the Hotel Vrindavan our common meeting point. On the 6th July I was working night shift and so had to reach there directly from office. On reaching there got some packed lunch from Hotel Vrindavan and had a filling breakfast of Vada Sambhar for myself.

We started our journey about 45 minutes late at 7:30 AM as Paravati had got onto a wrong train from Kurla which did not halt at Sion and so she had to come back from Dadar. We had a gala time in the Sumo discussing a wide plethora of topics, including Himesh Reshamia's newly released Aap Ka Suroor, Bappi Da's music, our past and recent trekking experiences and so on.


We enjoyed every bit of the Lush forest, numerous waterfalls and the Gargai river gushing in full force which was a great company all through our drive.
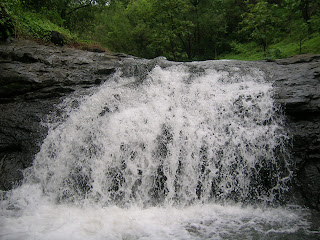

We happened to pass by a very beautiful waterfall thru our journey which we happened to underestimate and proceeded with our drive. After about 15 minutes of a drive we reached the place where we thought we could get our bodies wet but that waterfall was a total letdown as there was very less rain since morning on that day. So we decided to go back to the same waterfall which we had left behind by mistake.

We took a small trail to reach the waterfall off the main road where we changed our clothes to get under the waterfall. After tons and tons of fun and frolic and photography sessions we continued our journey.


We had lunch around 1 pm at the forest rest house on the plateau and then decided to have a walk through the plateau. Paravati was very excited about the idea of working with the local villagers in their fields and was supported by Manasi and Maggie for the same.


We continued to wander around the plateau until rain forced us to get back into the Sumo quickly.

As for butterflies seen: Jailed jay, leopard, common-crow, many lemon pansies (feeding on the flowering lea) grass yellow, plain tiger, glassy tiger.
Birds seen: Drongo, Kingfisher, little cormorant, mynas, cattle egrets in breeding plumage.
Heard the calls of: the brain fever bird (Hawk Cuckoo) puff throated babbler, Quaker babbler and many warblers.


On our journey back we were totally mesmerized by the beauty of the nature and the beautiful bridges of a gothic like architecture and waterfalls.


We reached Sion around 7:30 pm and then dispersed after bidding adieu to each other. I took a rickshaw along with Rohini ji to Bandra and then took a Virar fast local to Vasai.

For visiting my online album of this trip please visit:

http://picasaweb.google.com/harishdixit/suriamal

Cheers !

Harish.